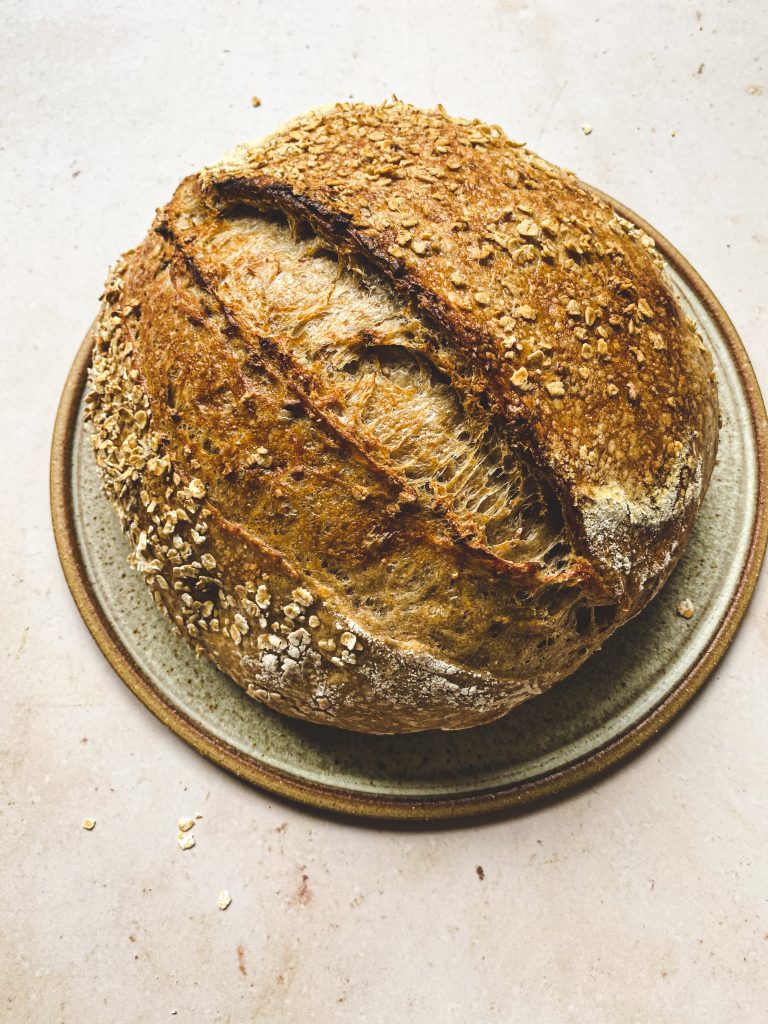
My love affair with sourdough started about 4 months ago – yes, I know…a little late to the party since the whole nation were getting their sourdough game on in 2020. Well, it’s never too late to learn. I’m completely enchanted by the process of baking a beautiful loaf and each and every time I get a slightly different result along with dopamine hits of varying intensities! It’s a very therapeutic process and somewhat addictive!
So before I word-vomit my entire sourdough diaries, here is a recipe that has worked particularly well for me up to this point, resulting in a good open crumb, crispy oaty exterior and a wonderful malted flavour. I’m still very much a novice but i’m thoroughly enjoying learning all-things-sourdough and experimenting with different flours and flavour combinations. For me, it has become one of life’s simple joys.
prep time and cooking time: 11 hours (not including the time it takes to get the starter active and bubbly!)
INGREDIENTS
- 100g active starter
- 355g warm water
- 300g organic strong malted brown (I used Marriage’s)
- 200g strong white bread flour (I used Doves Farm)
- 10g salt
- Plus: a handful of rolled oats to roll the shaped loaf in.
METHOD
- Start by adding the active, bubbly starter to a large bowl, then add 350g water and mix with the starter to form a milky liquid. Next, add the flours and mix to incorporate until it forms a shaggy dough. I used my hands or a silicone bench scrapper for this part. Cover with a damp tea towel and let it rest for an hour.
- After an hour of resting, add the salt on top of the dough and the remaining 5g of water. Using your fingertips, ‘dimple’ the salt into the dough then using your hands mix to incorporate. Keeping the dough in the bowl, lightly knead it for 5-6 minutes, cover and rest for 1 hour.
- Next, perform your first set of stretch and folds – wet your hands and gently pull one side of the dough, stretching it up and placing it back down on top of the dough – working your way around the dough, repeat this process 4-8 times, until the dough tension will not allow for any more.
- There is no set amount of stretch and folds that you need to do but I tend to do 3 sets with 30 minutes of rest in between. Cover the dough when resting.
- After my third set, I then move on to 3 sets of coil folds (30 minutes in between), which is a different technique to create tension and allow the gluten network to develop. If you want to stick to the stretch and fold technique, that’s perfectly fine!
- After final set of folding, allow the dough to rest in the bowl (covered) for 2 hours. Next, shape the dough, add a dusting of flour to a banneton basket and pop the shaped dough (seam side up). You might want to use a bench scrapper for extra help getting it into the basket. Cover the basket (a shower cap works brilliantly!) and allow the dough to proof at room temp for 1 hour and then pop it in the fridge for 2 hours.
- Place a dutch oven into to the oven and preheat at 250°C. Remove the dough from the fridge and tip it out onto parchment paper, then score with a sharp knife or razor blade. A single slash from top to bottom will be fine.
- Remove the preheated dutch oven and place the dough (on the parchment paper) inside. At this part, I like to add a few ice cubes into the dutch oven to create more steam. Pop them down the side of the parchment, not on the dough. I also give the dough a spritz with some water. Quickly put the lid on and bake for 20 minutes, then remove the lid, turn the oven down to 210°C, and bake for another 20-25 minutes, until it turns a golden brown.
- Remove from the oven, admire the beauty of your loaf and let it cool for a few hours before cutting into it. Enjoy toasted with a big chunk of butter – divine!

